
This guide explains how to install Bulk Attributes for WooCommerce® and use each of its screens to manage your product attribute terms faster.
Updating from 3.0 or 3.1.0? Version 3.1.1 is a critical security update. From 3.0: install and activate 3.1.1; it deactivates 3.0 for you, then delete 3.0. From 3.1.0: upload 3.1.1 over the existing plugin. See Updating and the changelog for details.
Requirements
WooCommerce must be installed and active.
- PHP 7.4 or later
- WordPress 6.0 or later (tested up to 7.1)
- WooCommerce® 7.0 or later (tested up to 11.1)
- Compatible with High-Performance Order Storage (HPOS)
Who can use it?
Administrators and Shop Managers: since version 3.1.1, access follows the WooCommerce manage_woocommerce permission. Assigning terms to a product also requires the right to edit that product.
Installing Bulk Attributes for WooCommerce
- Log in to My Account > Downloads with the e-mail address of your purchase (no password? use Lost your password?) and download the zip file.
- In WordPress, go to Plugins > Add New Plugin > Upload Plugin, choose the zip file and click Install Now.
- Click Activate Plugin. The Bulk Attributes menu appears in your admin menu.
Updating
- From version 3.0: install and activate 3.1.1. Version 3.0 is deactivated automatically and a notice asks you to delete it. Your hierarchy setting is kept. Please delete the old version: it is the vulnerable one.
- From version 3.1.0: upload 3.1.1 over the existing plugin (Plugins > Add New Plugin > Upload Plugin, then Replace current with uploaded). Your settings are kept.
- Data damaged by older versions is not repaired: version 3.1.1 prevents new damage but does not fix existing damage.
The plugin screens
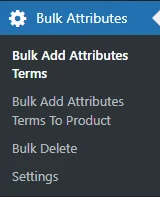
Once activated, the plugin adds a Bulk Attributes menu to your WordPress admin, with four screens:
- Bulk Add Attributes Terms: create terms in bulk.
- Bulk Add Attributes Terms To Product: assign existing terms to a product by ticking them, or paste a list of terms (created if missing) and assign them to several products at once.
- Bulk Delete: delete terms.
- Settings: attribute hierarchy.
The plugin works with the global attributes you create in Products > Attributes. Custom attributes defined on a single product are not supported.
Creating terms
Let’s suppose you sell an SSD that fits a long list of laptops, and you want each compatible laptop to be a term of a “Compatible laptops” attribute. Here is a short extract of such a list:
ProBook 430 G3
ProBook 440 G3
ProBook 450 G3
ProBook 470 G3
ProBook 640 G2
ProBook 650 G2
… (98 more)
Without the plugin, you would type each term one by one in Products > Attributes > Configure terms. With it:
- Create the attribute itself, if it does not exist yet: go to Products > Attributes, type its name (here “Compatible laptops”) and click Add attribute.
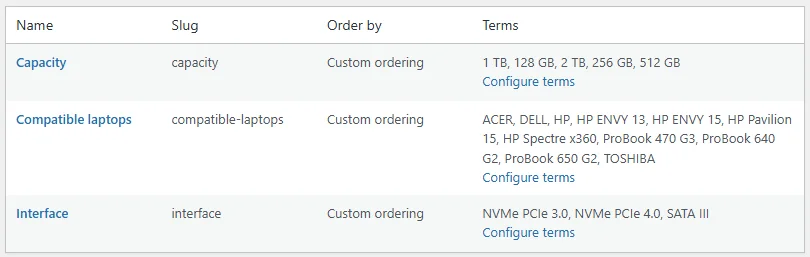
Global attributes in Products > Attributes. - Go to Bulk Attributes > Bulk Add Attributes Terms.
- In Bulk Add Attributes under, select the attribute (“Compatible laptops”).
- Paste your list in the Add Attributes box. Leave the parent list on Create Parent/Select Parent(create child) to create top-level terms.
- Click Add Terms (the button also shows the attribute number).
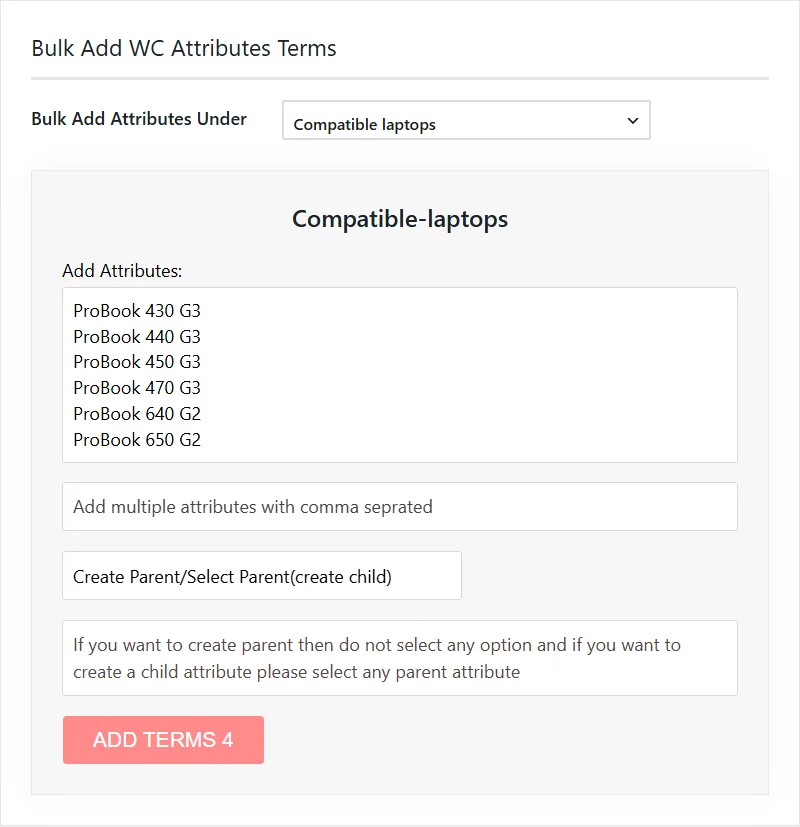
Creating terms from a pasted list.
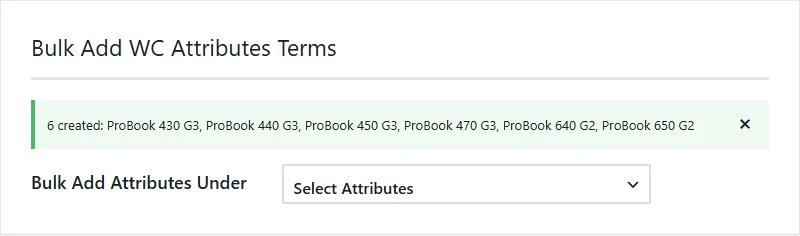
A message confirms the result, for example “6 created: ProBook 430 G3, …”; terms that already exist are listed as “already existed” and are not duplicated. The terms are now available on every product, in the product’s Attributes tab.
List formats
You can paste your terms in three formats:
- comma separated:
HP,DELL,ACER,TOSHIBA - pipe separated:
HP|DELL|ACER|TOSHIBA - one per line.
Use one format per list. If your list contains a comma, terms are split on commas only, so a term name cannot contain a comma. Duplicates and extra spaces are removed automatically.
Terms with hierarchy
Sometimes attribute terms need a hierarchy, for example to group laptop models by brand: HP, Dell, Acer and Toshiba become parent terms, and the models become their child terms.
HP: HP ENVY 13, HP ENVY 15, HP Spectre x360, HP Pavilion 15 …
Dell: XPS 13, XPS 15, Inspiron 15 …
Acer: TravelMate 6592, Aspire Z5610 …
Toshiba: Tecra A9, Tecra M10 …
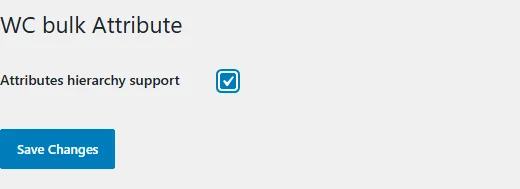
First, enable hierarchy. Go to Bulk Attributes > Settings, tick Attributes hierarchy support and click Save Changes. WooCommerce then shows parent and child terms as a tree in Products > Attributes > Configure terms.
- Create the parent terms. Go to Bulk Attributes > Bulk Add Attributes Terms, select the attribute, paste
HP,DELL,ACER,TOSHIBA, leave the parent list on Create Parent/Select Parent(create child) and click Add Terms. The message reads “4 created: HP, DELL, ACER, TOSHIBA”.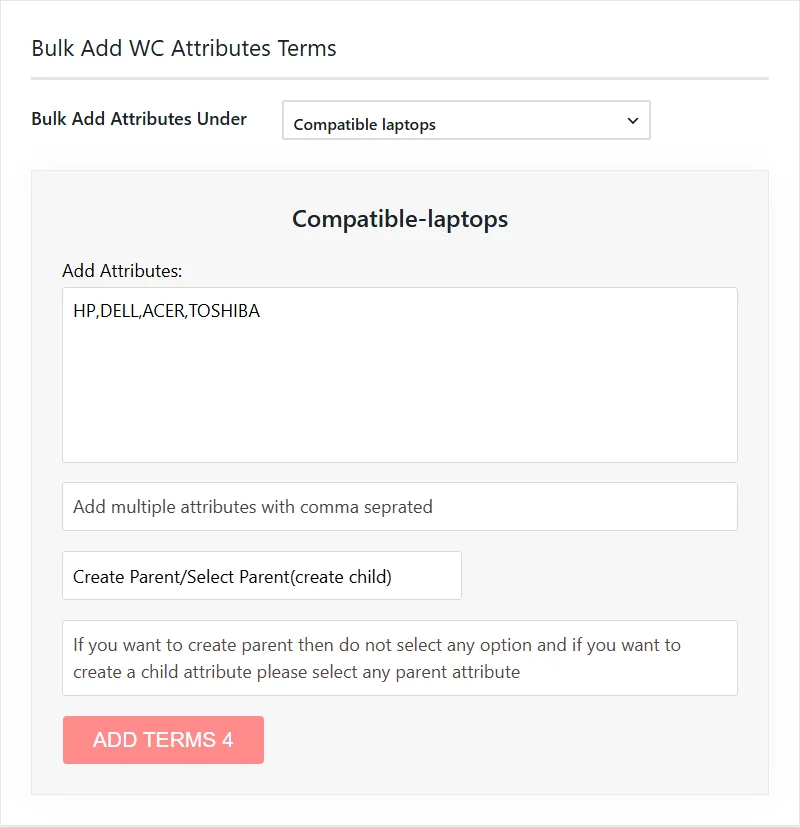
Parent terms, comma separated. 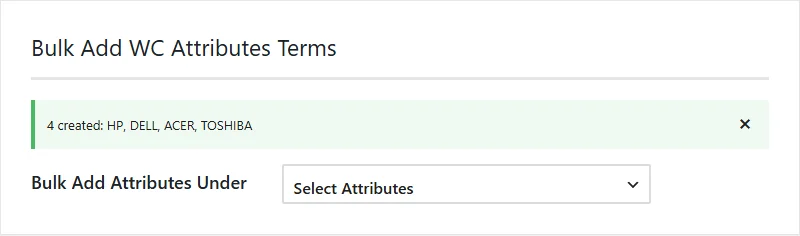
- Create the child terms. On the same screen, select the attribute again, paste the models of one brand, then select their parent (here “HP”) in the parent list and click Add Terms. The parent you select applies to every term in the list: add the children of one parent at a time.
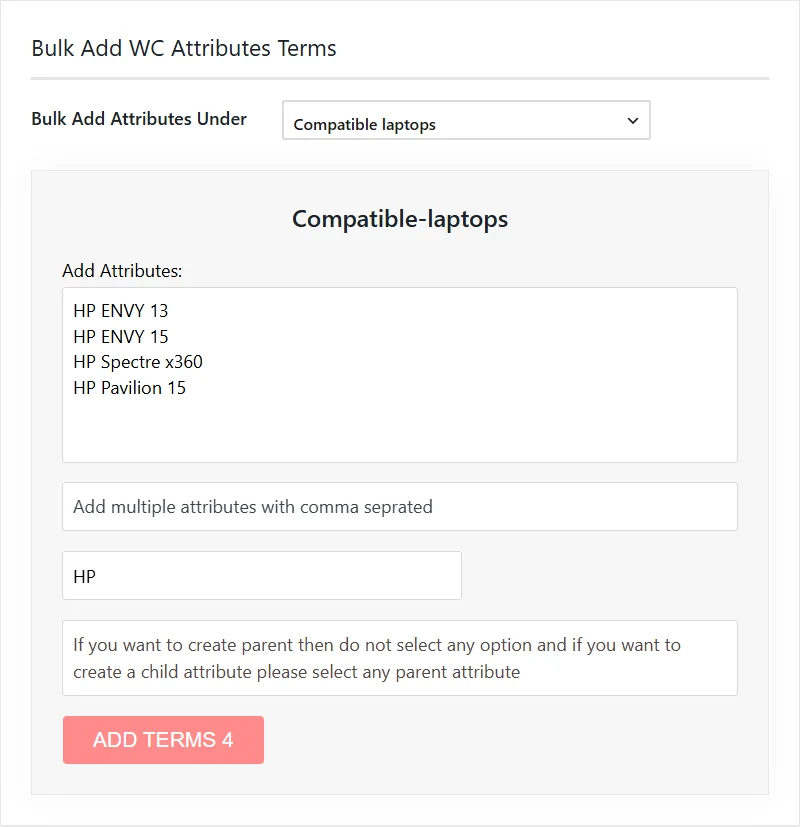
Child terms under the parent “HP”. 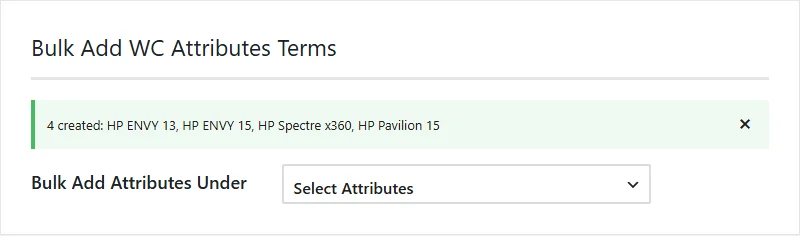
- Repeat for the other brands. In Products > Attributes > Configure terms, child terms appear under their parent.
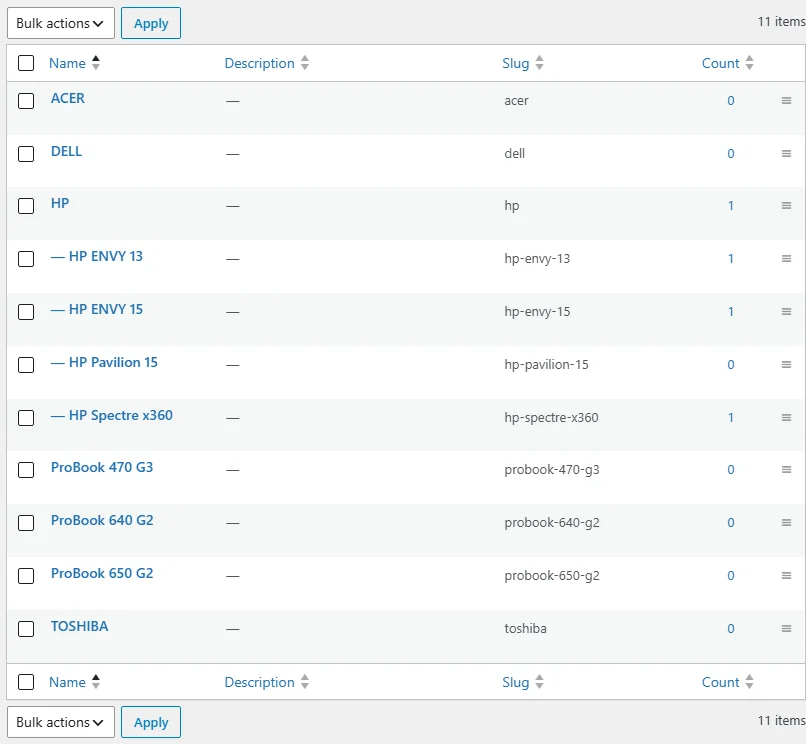
Parent and child terms in WooCommerce.
Assigning terms to products
Available since version 2.1. Go to Bulk Attributes > Bulk Add Attributes Terms To Product. The screen offers two ways to assign terms.
Tick existing terms for one product
Click the tab of an attribute (for example “Compatible laptops”). Tick the terms you want (use Select All and the search box for long lists), choose the product in the list and click Submit. Child terms can be assigned this way.
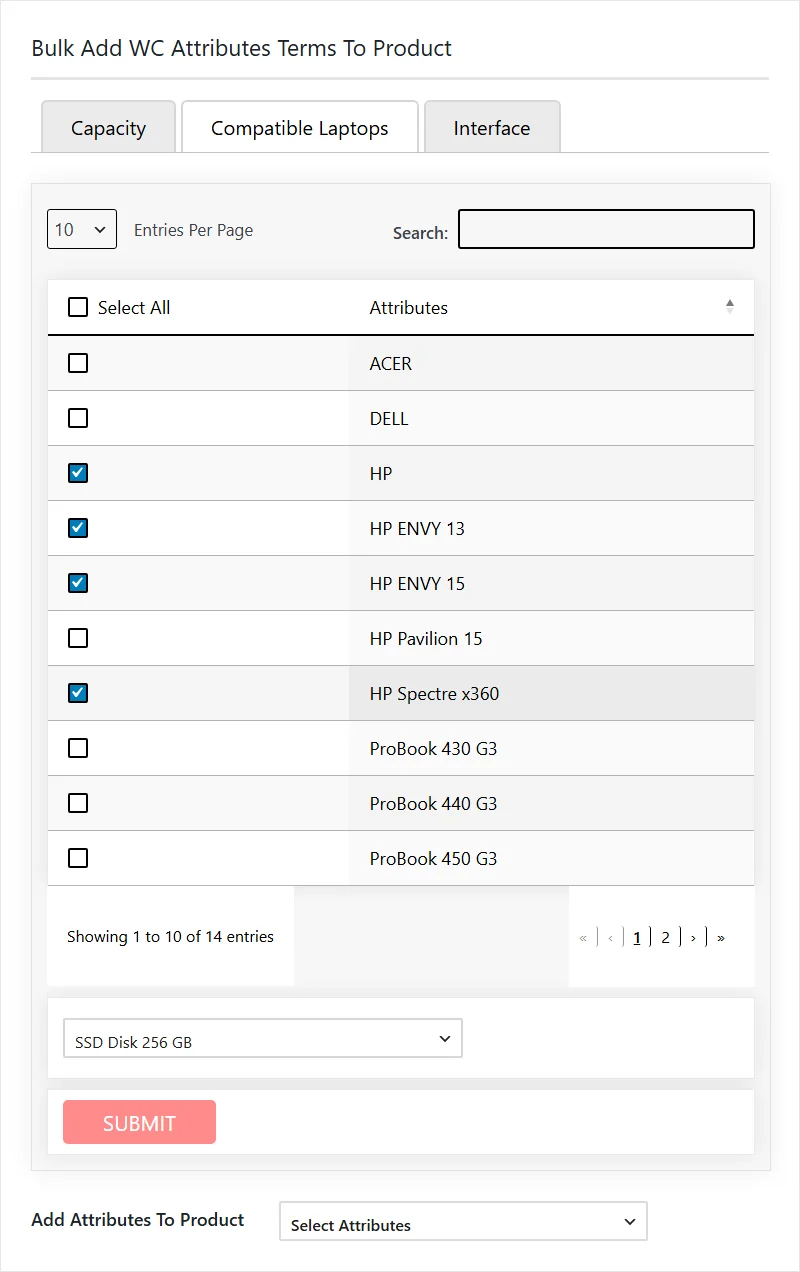

Paste a list for several products
Under Add Attributes To Product, select the attribute, paste your terms (comma separated, pipe separated or one per line), select one or more products (Ctrl/Cmd + click) and click Submit. Missing terms are created, then all terms are added to each selected product.
Terms typed in this box are created at the top level. To assign child terms, use the term table at the top of the screen instead.
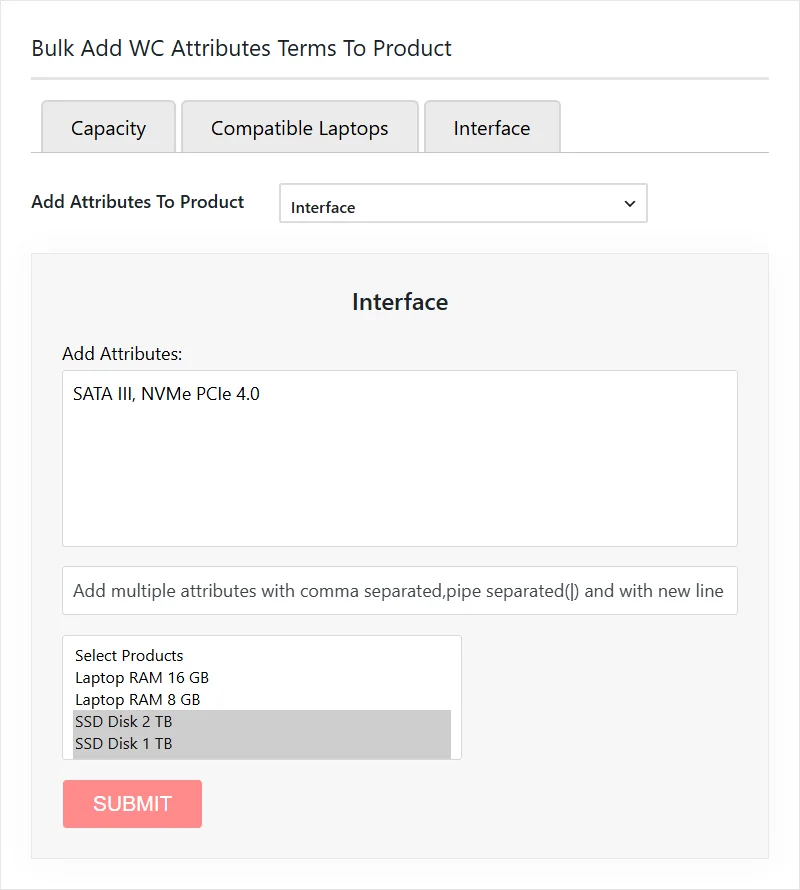

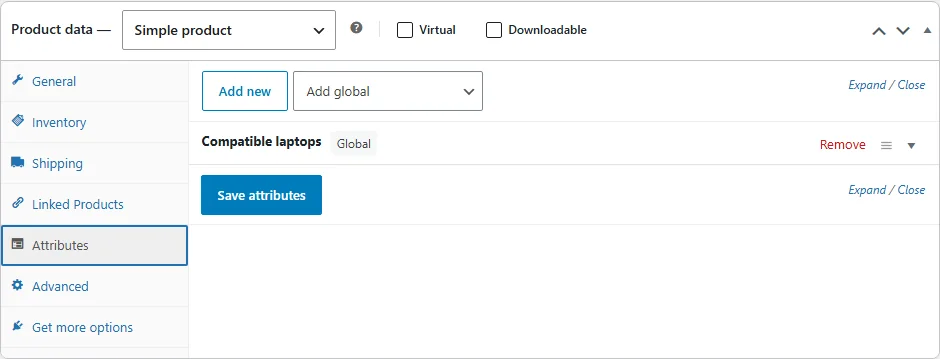
In both cases the attribute is added to the product, visible on the product page, without changing its other attributes or variations. Only published products are listed, and you can only update products you are allowed to edit. A message confirms the result, for example “12 terms assigned to 3 products.”
Deleting terms
Go to Bulk Attributes > Bulk Delete. Click the tab of an attribute, tick the terms to delete (or Select All) and click Delete. Deleted terms are removed from every product that uses them. If a deleted term has child terms, they move up to its parent.
Deletion cannot be undone: back up your database first.
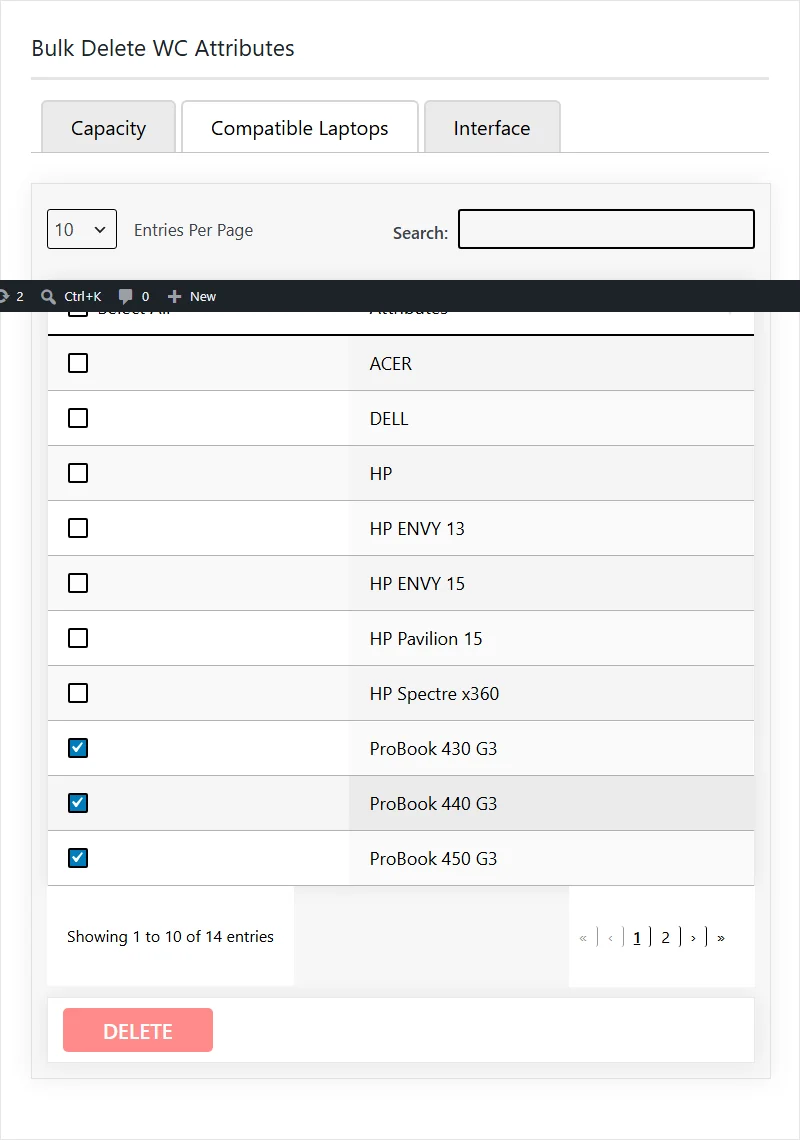
A message lists the deleted terms, for example “3 deleted: ProBook 430 G3, ProBook 440 G3, ProBook 450 G3”.

Settings
Go to Bulk Attributes > Settings. Tick Attributes hierarchy support to let attribute terms have parent and child terms, then click Save Changes. Your choice is kept when you update the plugin.
Need help?
Use our support form. To report a security issue, see our Security page.
Screenshots: version 3.1.1 on a demonstration store. Some screen labels are inherited from earlier versions (for example the screen title “Bulk Add WC Attributes Terms”). Tap or click a screenshot to enlarge it.